
Autobahn
🚗 – Description Workflow Autobahn
A flow, which queries another API and display traffic warnings for the german Autobahn "A3" in a human-readable format.

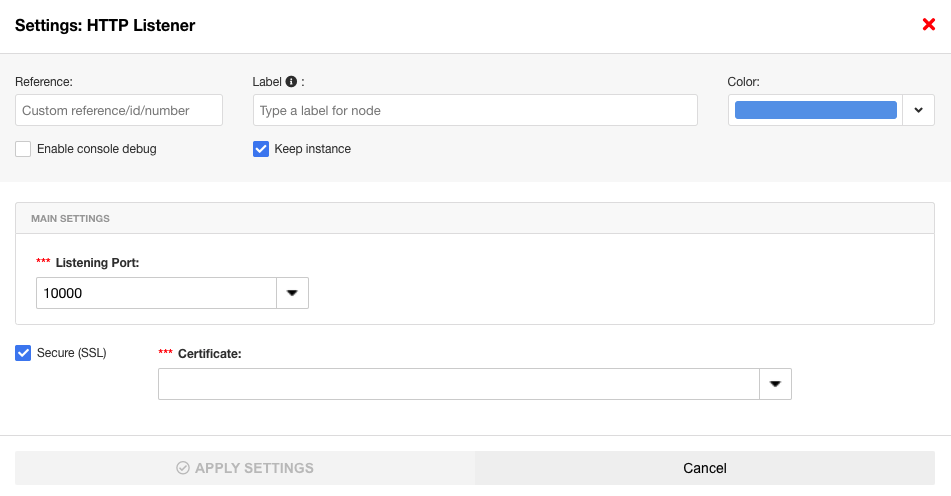
Let's start with the HTTP Listener. This Listener accepts requests from outside (internet) to access the workflow. This component has a small feature: there is no input and no output. If you are wondering why this component does not need to be connected to the workflow: an HTTP Listener can be used by several components.
In this case, the component is configured to open listening port 10,000. The Listening Port can be freely selected within a certain numerical range – you will find a selection in the settings of the component (double click on the component). If we are already in the settings: to offer encryption on the port, the checkbox Secure (SSL) and the default certificate can be selected. For special applications, a separate SSL certificate can also be used.
Next we look at the comment component: this is solely for the purpose of leaving a comment.

Let's take a look at the rest of the workflow and consider the GET Route /a3 (HTTP Route) component: this listens for "GET requests" on the URL /a3 from the HTTP Listener. For an incoming request, the HTTP Route sends it to the next component: in this case to the HTTP Request component. This component receives the incoming data and triggers an HTTP request against the API of the German autobahn operator in the background.
Once this API has returned a response, the HTTP Request component passes this response on to the Code (2 JSON) component. Let's take a quick look at the code: The code checks whether traffic messages are currently available. If this is the case, these are passed on to the output of the code component. If this is not the case, predefined title "No warnings!" and description "There are currently no traffic warnings for this Autobahn. Yay!" are output under 5 and 6.

The debug component is built in to analyse potential errors. The x on the left edge of the component indicates that the input of the component is currently deactivated. If I want to read out an error, I can activate the component by clicking on the x and a small black circle appears. The error can then be read out in the sidebar under Console.

We continue with the mustache component: I don't know what the developer was thinking when he named it. 🥸 But that does not play any further role in the explanation of this workflow. In this component, a template is built via the "Mustache" library that is filled with values from the code component, which come from the API. This template serves as a blueprint for the HTML page or determines how this page looks.
We have reached the HTTP Response component: the response to the HTTP Request component and ensures that the HTML page is returned to the client (for the non-developers among us: it ensures that the homepage is displayed).
In the HTTP Response component (under the settings), it is determined that the response contains HTML code or that the page is output as HTML.

There is a second code component in the workflow with the great name "2 Pretty Jason": this ensures that the JSON becomes readable for humans. In addition to the HTML output, there is also an output in the debug sidebar. Finally, the debug component (user-friendly output) remains. A debug component always ensures that an output is displayed in the sidebar.

Now we come to the exciting part: we trigger the workflow. To trigger the flow, we need to make an HTTP request in the browser. To do this, we open a new tab and paste the URL from the Designer.
The port information (the pre-selected listening port: here 10,000) is appended to the URL with a ":" .The specified URL is also appended, beginning with a "/" and the name of the autobahn (here a3).
-
Copy and paste the URL:
https**://daa2cfb0d5b611ec9143cf68016cbe01.flow.exo.link**/#autobahnen -
Adjust the URL:
https**://daa2cfb0d5b611ec9143cf68016cbe01.flow.exo.link**:10000/a3
Here is one small thing we have to pay attention to❗ : when I copy the URL it starts with https. This connection can only be established if i have ticked Secure (SSL) in the HTTP Listener component (this can be found in the settings of the component). Otherwise the https must be manually changed to http in order to display the page.

After the URL has been adjusted and enter has been pressed, the traffic messages appear. That´s it – We wish you a traffic-free journey at all times. 😊

✉️ – Support
We will be happy to help you 😊
We get back to you as soon as possible.
Updated about 1 month ago