
Setup
Get started by connecting your first chargers.
🧙♂️ – Wizard
After you register, you will be redirected to our Setup Wizard. Alternatively, you can go to it via https://exolink.cloud/setup.
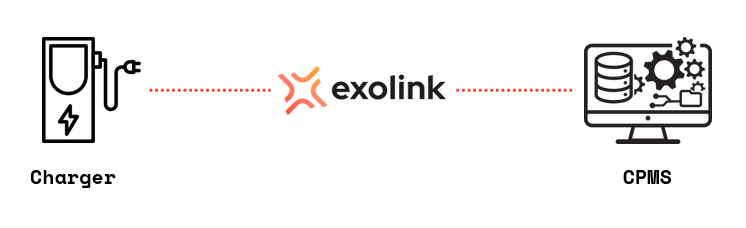
Here you will be guided through connecting Exolink to your CPMS and chargers to Exolink.
Step 1: Connect your CPMS
Select one or provide your own. The URL must look something like this: wss://example.exolink.cloud:443/
Do not enter the Charger ID in the CPMS URL.
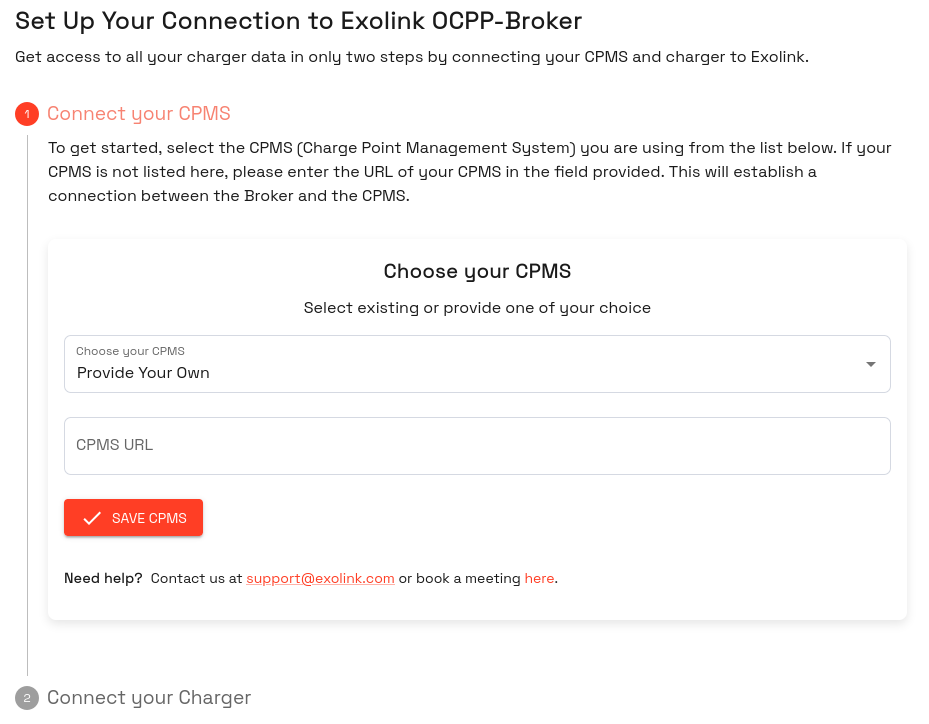
Enter the URL in the first step of the setup wizard
Step 2: Connect your Charger
In Step 2 you see a connect URL, which you have to enter in your charger configuration. The URL looks like this: wss://unique-identifier.exolink.broker/ or for insecure connections: ws://unique-identifier.exolink.broker/
After entering your CPMS URL, the Discovery Mode will be active for 3 hours. Any charger you're trying to connect during these 3 hours will be registered in Exolink. Once this time period is over, the Discovery Mode has to be started again or the Charger Identifier added to the Charger list manually.
Video
🔌 – Charger Profiles
Once you have finished the Setup Wizard, you will see a Default profile in the Charger Profile list. Here you can view the configured CPMS and how many chargers are assigned to the profile.
Charger Profile
Video
🏢 – CPMS
You can add other CPMS in the CPMS list. After that you can either edit the existing Charger Profile or create a new one in the Charger Profile list.
✉️ – Support
We will be happy to help you 😊
We get back to you as soon as possible.
Updated 3 months ago